Servicing (App Data Forms)
The Servicing menu hosts the app data forms.
App data forms allow you to create digital apps with flexible navigation for middle and back office operations, by using tabs for organizing the form. Compared to Form Driven Flows, app data forms allow you to navigate freely between form tabs, without the need of navigation buttons or a flow map.
Prerequisite
You need to have the underlying data model defined (entity and attributes), including any required data extensions (presented in the Extend the Data Model).
Create an App Data Form
- In FintechOS Studio, from the main menu, click Servicing > Service Extension Apps > App Data Forms.
- Click Create. The form configuration page appears which is comprised of two sections. It displays by default on the General section.
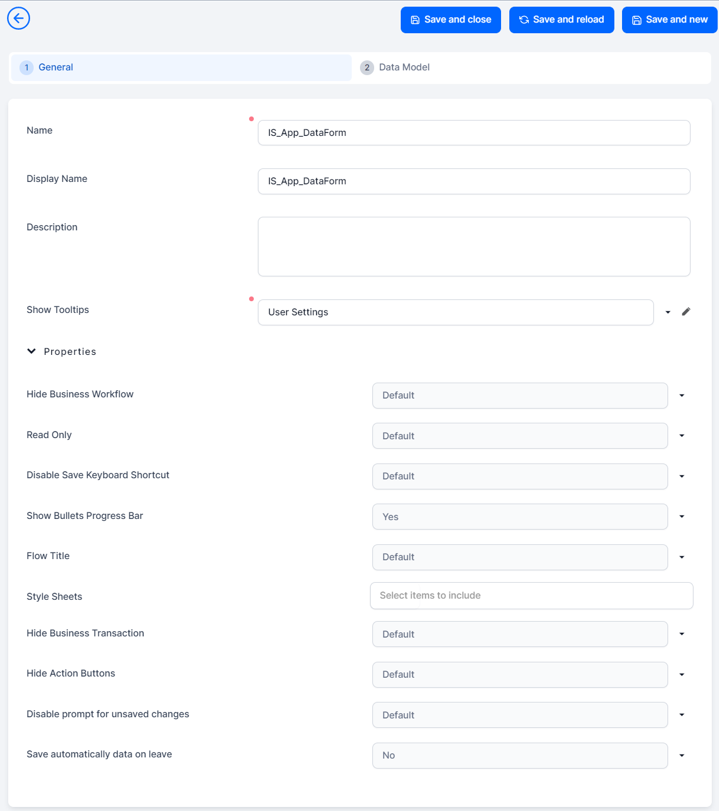
- Provide the general information:
Field Description Name The name of the app data form used internally by the system. This field is mandatory. NOTE
A naming convention is an important part in a well-built data model; therefore, we recommend you to use PascalCaseNames (upper camel). The Name starts with an uppercase letter, as do all additional words. For example: FTOS_CMB_BaseAccount.Display Name This is the name that displayed in the user interface. Choose a suggestive name. Description Optional description of the form. Show Tooltips Select how you want the tooltips to be shown for specific attributes in the user interface. The following values are available: - User Settings (default value). Give users the possibility to show tooltips by toggling on / off the Tooltips button displayed at the top-right corner of the UI.
- YES. Always show tooltips in the Portal UI when users hover their mouse on the attributes on fields which have tooltips. The users do not have the possibility to toggle the tooltips off.
- No. Never show tooltips in the Portal UI.
Hide Business Workflow Hides the entity record's state and state transition options in the end-user interface. For more information about business workflows, see the Business Workflows Processor documentation. Read Only Prevents end-users from making changes to the displayed form fields. Disable Save Keyboard Shortcut Prevents end-users from saving and reloading the form by pressing the Ctrl+S keyboard shortcut. Show Bullets Progress Bar The numbering of the steps appear on the progress bar. Choose one of the following:
- Default. The progress bar is not shown.
- Yes. The progress bar is shown and the navigation is done through the Next/ Previous buttons.
- No. The progress bar is not shown.
Render section tabs as a bullet list
If you tick this checkbox, the steps are displayed in the Digital Experience Portal as a bullet list and you can navigate between steps by clicking on the round numbered bullets.
Flow Title Select a title from the list:
- use display name (this name appears everywhere, on every step this name is exhibited)
- show only step display name (each step has its own name exhibited).
Style sheets Select the style sheet you wish to use. Multiple style sheets can be added. The order of how they are added is respected in the execution. For details, see Style Sheets. Hide Business Transaction Hides the Business Transactions button at the top right corner of the screen, which displays the business workflow transitions of the record. For more information about business workflows, see the Business Workflows Processor documentation. Hide Action Buttons Hides the Actions button at the top right corner of the screen, which allows you to open action groups or reports associated with the app data form (for details, see Defining Action Groups and Add Power BI Reports to Digital Journeys). Disable prompt for unsaved changes When navigating away from the form, for instance by clicking the Go Back button in the top left corner of the screen, if the form contains unsaved data, the user is not be prompted to save changes. Save automatically data on leave When navigating away from the data form, for instance by clicking the Go Back button in the top left corner of the screen, any unsaved data in the flow is automatically saved.
- Click the Data Model tab and from the Entity field, select the entity whose data model is used.
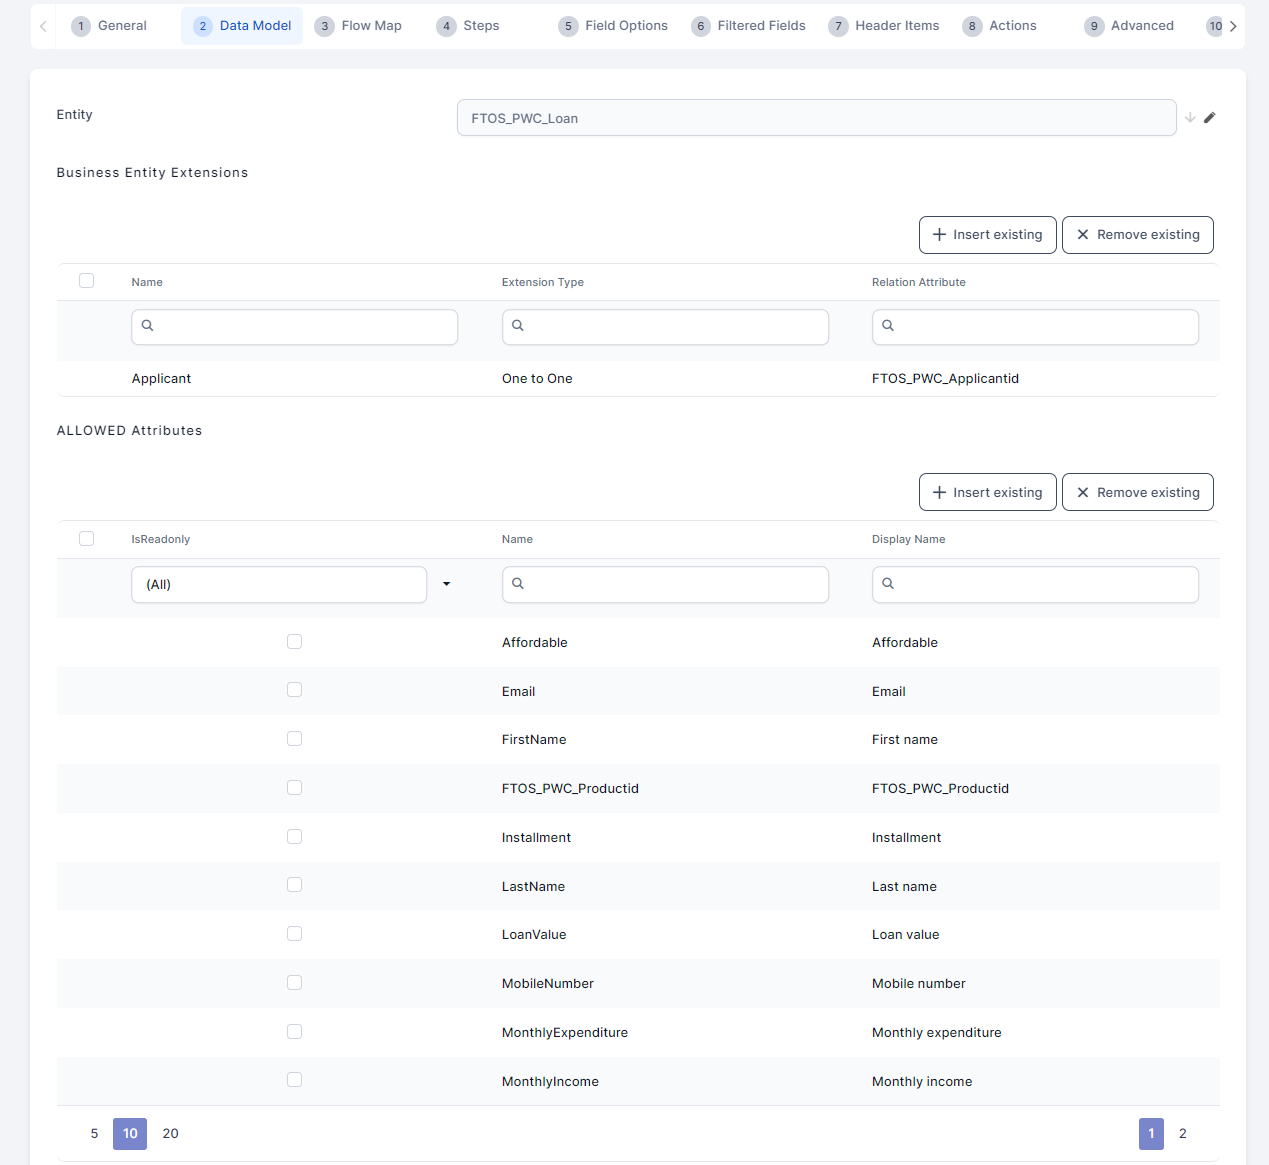
- Click Save and reload. The app data form page displays on the Data Model tab which has the Business Entities Extensions section expanded. For more information on how to add Business Entities Extensions, see Extend the Data Model.
If you want to render data extensions on the digital journey, you need to first register them by adding the entity extension. For more information, see Render Custom Data Extensions.
- After selecting the entity, select the attributes from it that you wish to use in particular. Click the Insert existing button and select from the list the attributes.
- To add virtual attributes, in the third grid of the Data Model, click Insert pre-existing and tick the virtual attributes to be added to the form.
- If you wish to restrict the form's access only to specific attributes in the data model, insert the corresponding values in the Allowed Attributes and Allowed Virtual Attributes sections. By default, all attributes in the data model are available to the form's context. Once you start populating the allowed attributes sections, the form is restricted from accessing any attributes except the ones explicitly defined in these sections.
- Click Save and close to save your app data form.
Set the App Data Form Default Type
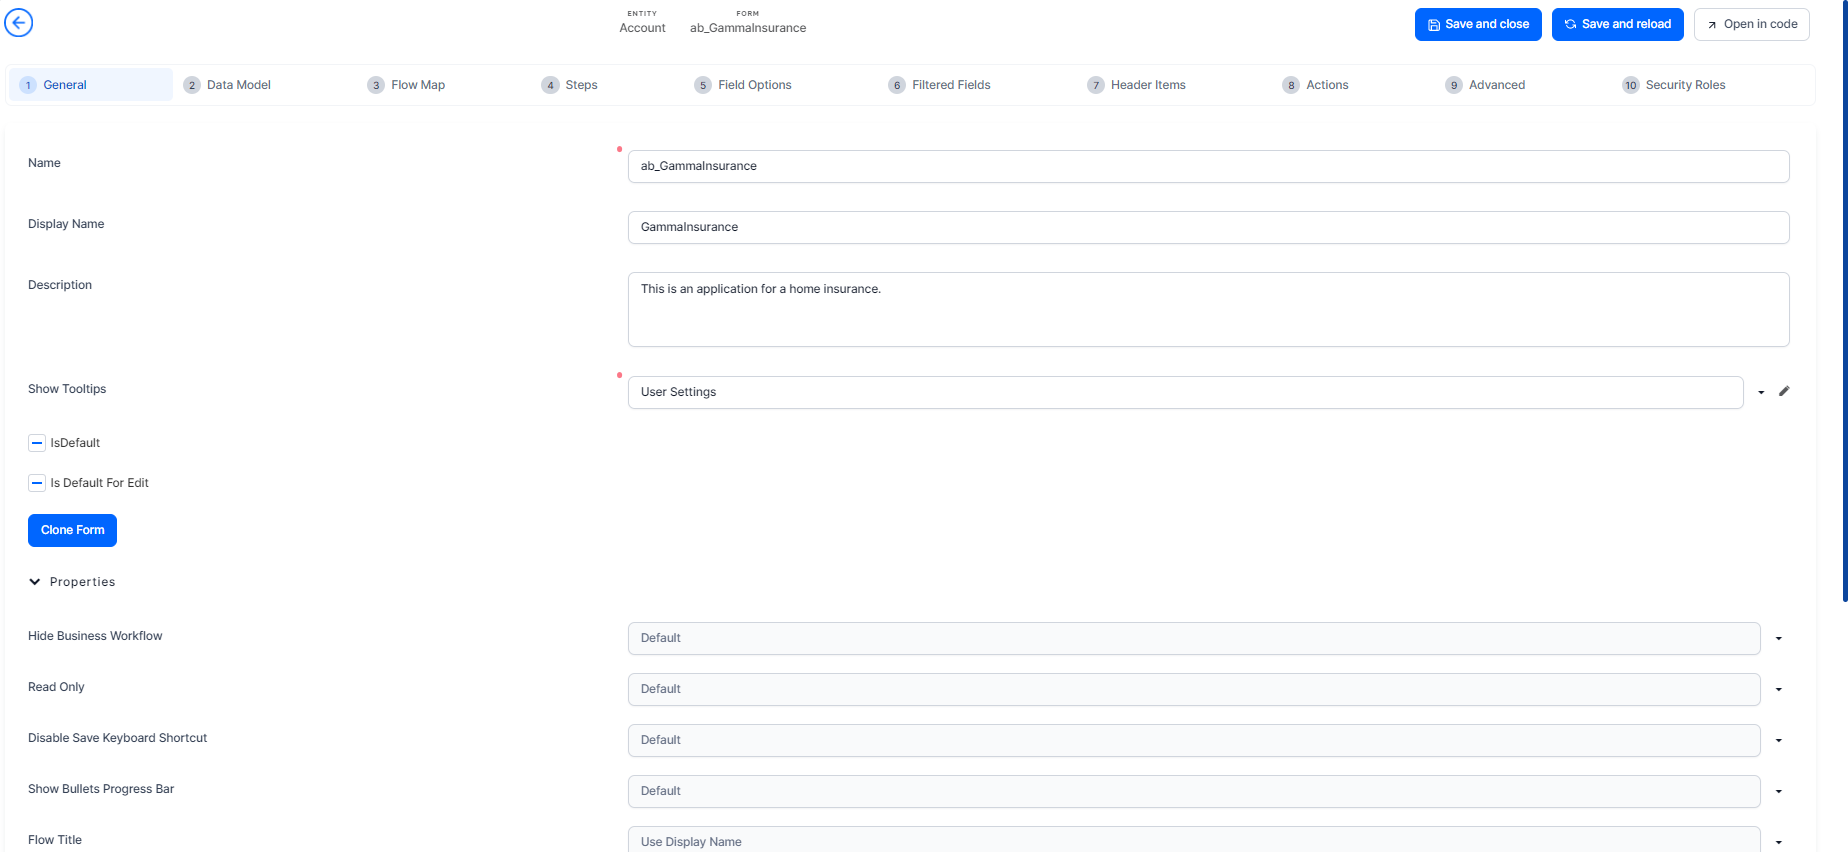
Click the General tab and set the app data form default type by ticking the appropriate checkbox:
- IsDefault to set the data form by default on Insert mode.
- Is Default For Edit to set the data form by default on Edit mode.
Each entity has a default auto-generated data form which contains all the attributes of the data model you're using. If you want to make changes to the default data form, leave the Auto Generate Template checkbox unticked, otherwise on entity updates (e.g., add a new data form attribute), the data form is overwritten and all the updates are lost.
You can set to automatically generate the data form template by ticking the Auto Generate Template checkbox and selecting from the Auto Generate Template Type field one of the options available: Inherit, 1 Column, 2 Columns, 3 Columns and 4 Columns.
If inherit is selected, the data form layout inherits the value from the entity which is parent for the current entity.
For backwards compatibility, a default auto-generate data form template is available at application level in the web.config file, 1-column data form template.
If the checkbox is selected, on data form save, the existing data form template is overwritten with the auto-generated one.
Define Who Has Access to the Form
If your business case requires that the app data form is available to designated roles within your organization, click the Security Roles tab and add the security roles who should have access to them. If no security roles are added here, all users are able to view the app.
Clone an App Data Form
To duplicate an app data form with all of its configurations, in the General tab, click Clone Form.
Insert a name for it and click Clone. The new app data form opens immediately for editing.
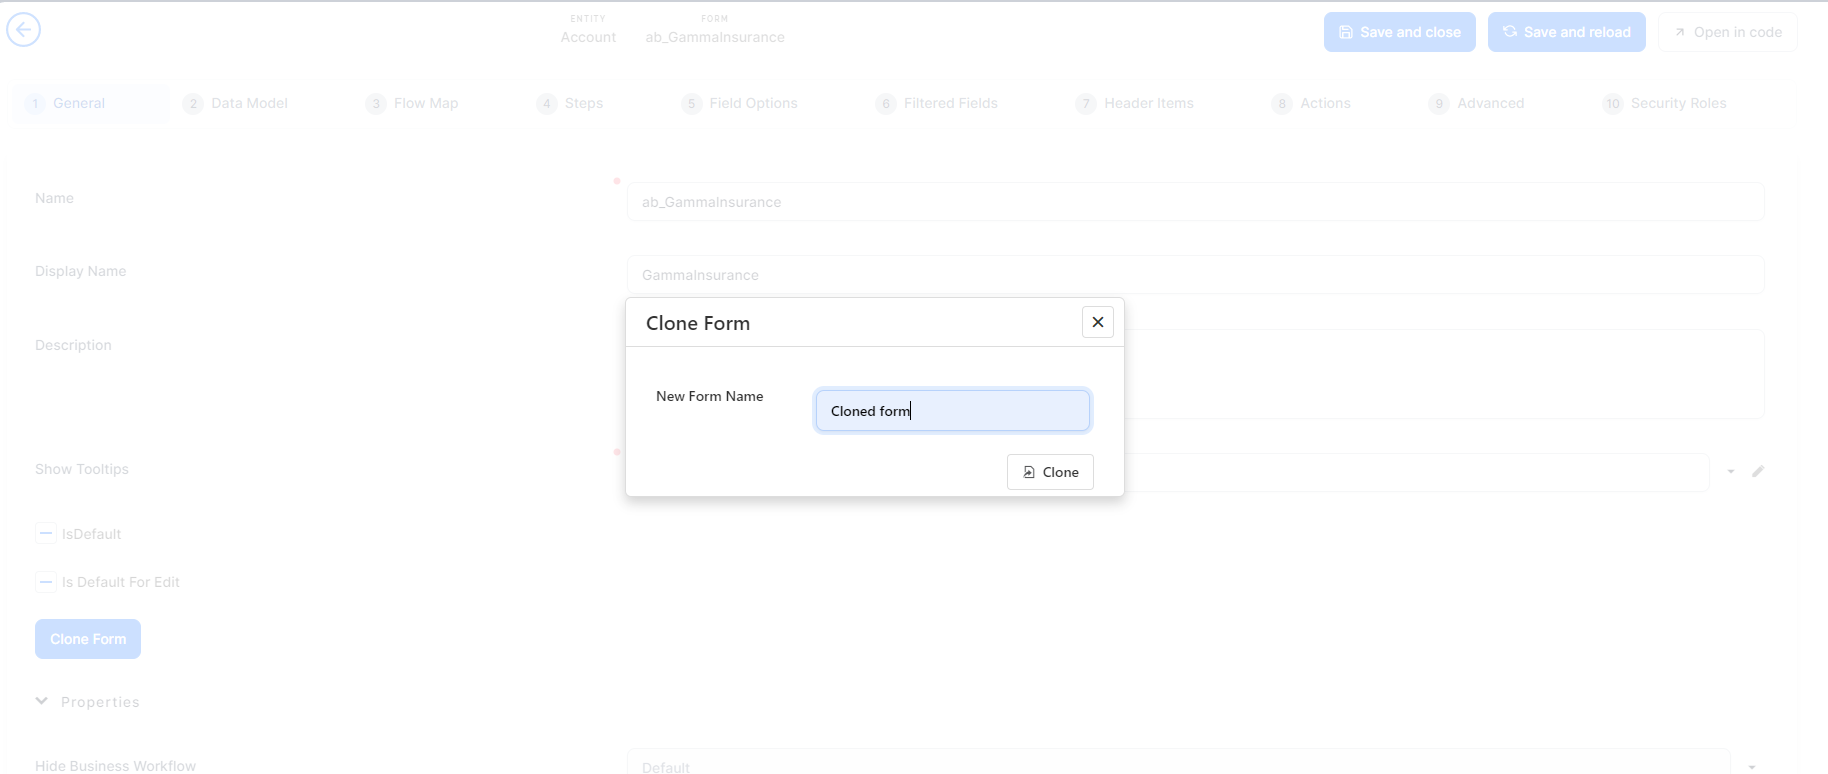
The data set behind it is not cloned, simply the form and its settings.
The Is Default and Is Default For Edit settings are not replicated in the cloned form, since you can have only one default app data form per entity.
For detailed procedures on how to do extensive configuration of app data forms, expand the below sections:
Grouping entity information steps, based on specific criteria (business, operational or other relevant to you) is useful especially in complex financial activities when you have to display a lot of information on digital journeys. You can add as many default steps as you need in the Steps section (tab) based on your criteria.
If you only need one section on your journey, add it to the Steps section; it is not be marked as step in the Digital Experience Portal.
To avoid issues with the steps loading order, we recommend you to define functions in the journey and only call them within the steps. Rendering a step automatically loads and renders the main journey.
Before changing the behavior of an element existing on a step by using logic in a different step, make sure that both steps were previously rendered.
This feature allows you to customize the fields displayed in the user interface and to create rules which apply to specific fields based on how users have filled out other fields in the form driven flow: show field values, show or hide specific fields, etc. For more details on how to configure and customize field options check the Configure Field Options section.
In the Filtered Fields tab you can control the values that can be used in a field based on the value selected in another field. For example, the Countries and States / Provinces fields. When a user selects a country, you might want to display the states / provinces corresponding to the selected country. Check the Define Filtered Fields section to get more details on how to add filtered fields.
When creating app data forms, the Header Items tab allows you to make the app data form sticky on scroll, which is useful when a data form has many attributes and users have to scroll-down to complete it. In order to see how you can add a header item to an app data form, check the Add a new header itemsection.
Form actions provide a no-code method for generating a report, run a server side script, run a business decision matrix and call a formula. In order to understand how to create a form action check the Define Form Actions section.
FintechOS Studioalso allows you to create a custom group of actions that can be triggered on demand on app data forms, when a button is clicked. Check the Defining Action Groups page for details on how to create the action groups.
Using the Advanced tab you can highly customize the user interface by rendering custom data extensions . For mode details, check the Rendering Data Forms section.
You can also create personalized forms such as custom search forms. To create a custom search data form based on input fields, search button and list results, follow the guidance in the Creating Custom Search Forms section.